
Are you wondering if your shipping container is ready for a fresh coat of paint? Proper preparation is key to a successful painting project. A well-prepared surface ensures a durable and long-lasting finish.
Preparing your shipping container for painting involves several crucial steps.
A thorough cleaning, rust removal, and surface repair are essential to create a smooth surface for painting.
Key Takeaways
- Cleaning the shipping container surface is essential
- Rust removal is crucial for a durable finish
- Surface repair ensures a smooth painting surface
- Proper preparation extends the lifespan of the paint
- A well-prepared surface ensures a professional finish
Understanding Shipping Container Materials and Surfaces
Understanding the materials used in shipping containers is essential for a successful painting project. Shipping containers are primarily made from steel, which can be either corten steel or standard steel. The type of steel used affects the painting process due to differences in their surface characteristics.
Common Types of Shipping Containers
Shipping containers come in various types, including dry storage containers, refrigerated containers, and tank containers. The most common type used for storage and conversion projects is the dry storage container, typically made from corten steel. Corten steel containers are preferred for their durability and resistance to weathering.
Container Surface Composition
The surface composition of shipping containers can vary significantly. Corten steel containers have a rust patina that acts as a protective layer, while standard steel containers may have a more uniform surface. Understanding the surface composition is crucial for selecting the right primer and paint.
Challenges of Painting Metal Containers
Painting metal containers, especially those made from corten steel, presents several challenges. The rust patina on corten steel can make it difficult for paint to adhere properly. Additionally, the surface may require special preparation to ensure a durable finish. Following painting tips for shipping containers can help overcome these challenges, such as using the right primer and ensuring the surface is clean and prepared.
When painting a shipping container, it’s essential to consider the type of metal and its surface condition to achieve a long-lasting paint job.
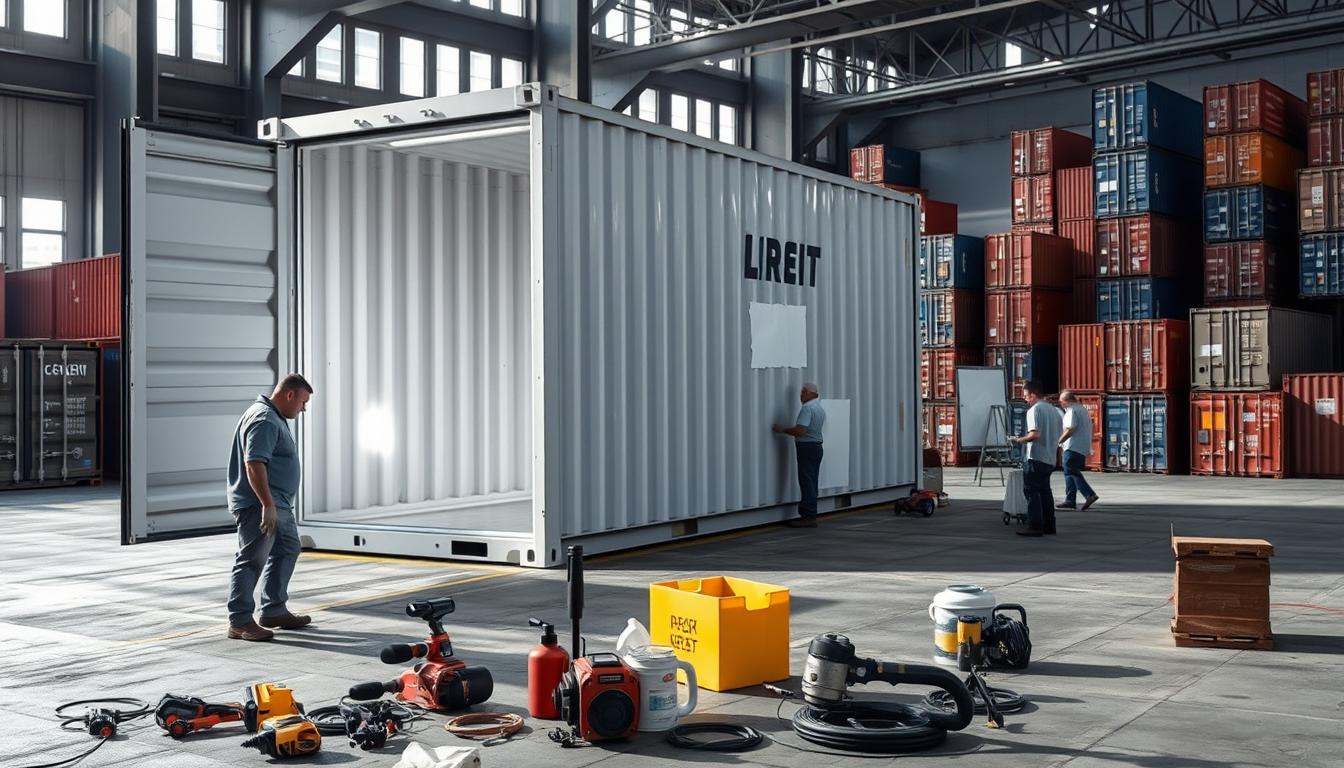
Essential Tools and Materials for Container Preparation
Before applying paint to a shipping container, it’s essential to understand the essential tools and materials needed for proper preparation. This preparation phase is crucial for a successful painting project.
Safety Equipment
Safety should be the top priority when preparing a shipping container for painting. Essential safety equipment includes gloves, safety glasses, and a respirator mask to protect against harmful chemicals and debris.
Cleaning Supplies
Effective cleaning is vital for a smooth paint job. Necessary cleaning supplies include degreasers, pressure washers, and stiff-bristled brushes to remove dirt, grime, and grease from the container’s surface.
Surface Preparation Tools
To ensure a durable paint finish, the container’s surface must be properly prepared. Tools needed for this step include sanding equipment, scrapers, and wire brushes to smooth out the surface and remove rust.
Recommended Primers and Paints
Choosing the right primer and paint is critical for a long-lasting finish. For shipping containers, rust-inhibiting primers and high-quality exterior paints are recommended. These products help protect the metal from corrosion and withstand various environmental conditions.
By gathering these essential tools and materials, you’ll be well-prepared to tackle the painting project efficiently and effectively, following the necessary steps for painting a shipping container and ensuring a professional-grade painting prep for shipping container.
Safety Precautions When Working with Shipping Containers
Preparing shipping containers for painting requires careful attention to safety protocols. This step is crucial not only for the quality of the paint job but also for the safety and well-being of those involved in the process.
Personal Protective Equipment
When working with shipping containers, personal protective equipment (PPE) is essential. This includes gloves, safety glasses, and respirators to protect against dust, chemicals, and other hazards. As emphasized by safety experts, “PPE is the last line of defense against workplace hazards.”
Ventilation Requirements
Adequate ventilation is critical when painting shipping containers. Proper airflow helps prevent the accumulation of fumes from paints and chemicals, reducing the risk of inhalation. Ensure that your workspace is well-ventilated to maintain a safe working environment.
Chemical Handling Safety
Handling chemicals for painting requires caution. Always follow the manufacturer’s instructions, and be aware of the potential hazards associated with the chemicals you’re using. Proper labeling and storage are also key to chemical safety.
Working at Height Considerations
When painting shipping containers, workers often need to work at heights. Safety harnesses and ladders should be used to prevent falls. Regular inspection of equipment is also necessary to ensure it remains in good condition.
By following these safety precautions, you can ensure a safe and successful painting process for your shipping container, adhering to best practices for painting a shipping container and valuable painting tips for shipping containers.
Initial Container Assessment and Planning
The initial assessment of your shipping container is a critical step in the painting preparation process. This step is essential for preparing a shipping container for painting effectively.
Identifying Damage and Rust
Begin by inspecting the container for any signs of damage or rust. Check for dents, dings, and rust spots, particularly in areas prone to moisture accumulation. As Rust is a significant concern for shipping containers, identifying it early is crucial.
Documenting Problem Areas
Documenting the problem areas is vital for planning the preparation work. Take photos or notes of any damage or rust you find. This documentation will help you create a focused preparation plan.
Creating a Preparation Timeline
With your documentation in hand, create a timeline for the preparation work. This timeline should include tasks such as cleaning, rust removal, and surface preparation. A well-planned timeline ensures that the project stays on track.
Environmental Considerations
Consider the environmental conditions that may affect your painting project. Weather, humidity, and temperature can all impact the painting process. As a seasoned expert once said,
“The right conditions are just as important as the right materials when it comes to painting a shipping container.”
Plan your project accordingly to achieve the best results.
How to Prepare a Shipping Container for Painting: First Steps
Before applying paint to a shipping container, it’s essential to undertake a series of preparatory steps to guarantee optimal adhesion and durability. These initial steps are crucial for achieving a professional-grade finish.
Removing Hardware and Fittings
The first step involves removing any hardware and fittings from the shipping container. This includes door handles, locking mechanisms, and any other removable parts. By doing so, you ensure that these components do not interfere with the painting process or get damaged by paint or cleaning chemicals.
Tip: Store the removed hardware in a safe place to avoid losing any parts.
Covering Areas Not to Be Painted
Next, identify and cover areas that should not be painted, such as windows, doors, and any other surfaces that need to remain unpainted. Use masking tape and plastic sheets to protect these areas effectively.
Expert Advice: “Using the right masking materials can significantly reduce the risk of paint seepage and ensure clean lines.” – Painting Expert
Setting Up Your Work Area
Setting up a proper work area is vital for efficiency and safety. Ensure the area is well-ventilated, clear of debris, and has adequate lighting. Cover the ground with drop cloths or plastic sheets to protect it from paint spills and other contaminants.
Organizing Your Workflow
Organizing your workflow is critical for a smooth painting process. Plan out the sequence of tasks, from cleaning to painting, and ensure you have all necessary tools and materials within easy reach.
As John Smith, a seasoned contractor, once said, “A well-organized workflow can cut down preparation time by up to 30%, making the entire process more efficient.” – This emphasizes the importance of planning in the preparation phase.
Thorough Cleaning Techniques for Shipping Containers
To achieve a professional-grade paint finish on a shipping container, it’s crucial to start with a thorough cleaning process.
Removing Dirt and Debris
The first step in cleaning a shipping container is to remove any loose dirt and debris from its surface. This can be done using a stiff-bristled brush or a broom, paying particular attention to areas around rivets and seams where dirt tends to accumulate.
Degreasing the Container Surface
After removing loose debris, the next step is to degrease the container’s surface. This involves applying a degreaser to remove any grease, oil, or other substances that could interfere with paint adhesion. It’s essential to use a degreaser that’s suitable for metal surfaces and to follow the manufacturer’s instructions for application and rinsing.

Pressure Washing Guidelines
Pressure washing is an effective method for cleaning shipping containers, but it must be done carefully to avoid damaging the metal.
Recommended Pressure Settings
The pressure setting should be adjusted according to the container’s surface condition. A lower pressure setting is recommended for surfaces with loose or flaking rust.
Proper Washing Technique
Keep the nozzle at least 12 inches away from the surface and use a wide fan tip to distribute the pressure evenly. Move the nozzle in a consistent, back-and-forth motion to clean the area thoroughly.
Dealing with Stubborn Contaminants
For stubborn contaminants like tar or adhesive residue, specialized cleaning products may be necessary. Apply the product according to the manufacturer’s instructions and ensure the area is well-ventilated.
| Cleaning Method | Best For | Precautions |
|---|---|---|
| Degreasing | Grease, oil, and grime | Use suitable degreaser, follow instructions |
| Pressure Washing | General dirt and debris | Adjust pressure, keep nozzle at distance |
| Specialized Cleaners | Stubborn contaminants like tar or adhesive | Follow product instructions, ensure ventilation |
By following these thorough cleaning techniques, you can ensure a clean and prepared surface for painting your shipping container, ultimately leading to a durable and professional-looking finish.
Rust Removal and Treatment Methods
Effective rust removal is crucial for a successful painting process when preparing a shipping container. Rust can weaken the metal and compromise the container’s integrity, making it essential to address before applying paint.
Manual Rust Removal Techniques
Manual methods are often the first line of defense against rust on shipping containers. These techniques are effective for smaller areas of rust and can be performed with basic tools.
Wire Brushing
Wire brushing is a simple yet effective method for removing surface rust. It involves using a wire brush to scrub away the rust, revealing cleaner metal underneath. This method is best for light surface rust and should be followed by a thorough cleaning.
Sanding and Grinding
For more stubborn rust, sanding or grinding may be necessary. These methods involve using power tools to remove rust and smooth out the metal surface. It’s crucial to wear protective gear, including gloves and safety glasses, when using these techniques.
Chemical Rust Converters and Removers
Chemical rust converters and removers offer a more thorough solution for dealing with rust. These products can penetrate deeper into the metal, converting rust into a stable surface that can be painted over.
Key Considerations:
- Always follow the manufacturer’s instructions.
- Wear appropriate protective gear, including gloves and eyewear.
- Ensure good ventilation when working with chemical products.
Treating Severely Corroded Areas
In cases where rust has caused significant corrosion, more extensive repairs may be needed. This can involve cutting out corroded sections and replacing them with new metal.
Preventing Future Rust Formation
After removing rust and treating the metal, it’s essential to take steps to prevent future rust formation. Applying a rust-inhibiting primer is a critical step in this process.
Here’s a summary of rust removal and treatment methods in a tabular format:
| Method | Description | Best For |
|---|---|---|
| Wire Brushing | Manual removal using a wire brush | Light surface rust |
| Sanding/Grinding | Power tool removal | Stubborn rust |
| Chemical Converters | Chemical treatment to convert rust | Deep or widespread rust |
Surface Preparation Techniques
The key to a durable and visually appealing paint job lies in thorough surface preparation. Properly preparing the surface of a shipping container is essential for ensuring the paint adheres well and lasts longer.
Sanding and Smoothing
Sanding is a critical step in surface preparation. It helps remove minor rust spots, smooths out the surface, and creates a better bond between the metal and the paint. Use a medium-grit sandpaper to start with, followed by a finer grit for a smoother finish.
Filling Dents and Holes
Dents and holes need to be filled to create a uniform surface. Use a suitable filler that is compatible with the container’s material and the paint to be used. Ensure the filler is fully cured before sanding it down to a smooth finish.
Creating an Ideal Surface Profile
An ideal surface profile is crucial for paint adhesion. After sanding and filling, the surface should be free of imperfections and have a texture that allows for optimal paint adherence. According to experts,
“A well-prepared surface is half the battle in achieving a high-quality paint job.”
Further guidance on surface preparationcan be found in detailed industry.
Testing Surface Readiness
Before applying paint, it’s essential to test the surface readiness. Check for any remaining rust spots, ensure the surface is dry and clean, and verify that the surface profile is adequate for painting.
Applying Primer to Your Shipping Container
The key to a durable paint finish on your shipping container lies in the application of primer. Primer serves as a crucial intermediary layer between the metal surface of the container and the paint, enhancing adhesion and ensuring a uniform finish.
Choosing the Right Primer
Selecting the appropriate primer is vital for the longevity and appearance of your paint job. Two types of primers are particularly suited for shipping containers:
Marine-Grade Primers
These primers are designed to withstand harsh marine environments, offering excellent resistance to corrosion and weathering. They are ideal for shipping containers that will be exposed to saltwater or high humidity.
Rust-Inhibiting Primers
Rust-inhibiting primers contain chemicals that actively work to prevent rust formation on metal surfaces. They are particularly useful for containers with existing rust or those that will be used in environments prone to moisture.
Primer Application Methods
The method of primer application can significantly affect the outcome of your painting project. Two common techniques are:
Brush and Roller Techniques
Using a brush or roller allows for detailed work, especially in areas with complex geometries or hard-to-reach spots. This method ensures thorough coverage and can be particularly effective for smaller containers or touch-up jobs.
Spray Application Tips
Spraying primer can provide a smooth, even coat over large areas quickly. It’s essential to use proper spraying techniques and safety equipment to avoid overspray and inhalation of primer particles.
As illustrated in the table below, different application methods have their advantages and are suited for different container sizes and conditions.
| Application Method | Advantages | Suitable Container Size |
|---|---|---|
| Brush/Roller | Detailed work, good for small areas | Small to Medium |
| Spray | Fast, even coat over large areas | Medium to Large |
Drying and Curing Times
After applying primer, it’s crucial to allow sufficient time for drying and curing. The specific drying time will depend on the primer product and environmental conditions. Generally, it’s recommended to wait at least 24 hours before applying paint to ensure the primer is fully cured.
Tip: Always follow the manufacturer’s instructions for the specific primer you’re using, as drying and curing times can vary.

By carefully selecting and applying primer, you can significantly enhance the durability and appearance of your shipping container’s paint job. Remember, a well-prepared surface is key to a successful painting project.
Addressing Special Problem Areas
Effective preparation of a shipping container for painting involves tackling problem areas that can affect the final result. Certain features of shipping containers require extra attention to ensure a smooth, durable finish.
Corner Castings and Door Hinges
Corner castings and door hinges are critical areas that need special care. These parts are prone to rust and can be challenging to paint evenly. To address this, clean and degrease these areas thoroughly before applying any paint or primer.
Handling Logos and Previous Markings
Existing logos and markings can be difficult to cover completely. Using a high-quality primer can help achieve a uniform base coat. For stubborn markings, consider using a specialized cover-up paint or primer.
Preparing Container Floors
While the focus is often on the exterior, the floor of the container also requires attention, especially if you’re planning to use the container for storage or as a workspace. Ensure the floor is clean and free of debris.
Dealing with Seams and Welds
Seams and welds can be particularly challenging due to their texture and potential for rust. Sanding these areas can help create a smoother surface for painting. For more severe cases, applying a rust converter or filler may be necessary.
By addressing these special problem areas, you can ensure a more professional and lasting paint job on your shipping container. For more painting tips for shipping containers, consider consulting resources that specialize in container refurbishment.
Final Pre-Painting Inspection Checklist
To guarantee a professional-looking result, it’s essential to conduct a comprehensive inspection of your shipping container before painting. This final check ensures that all previous steps have been completed satisfactorily and that the container is ready for painting.
Surface Quality Assessment
Begin by assessing the surface quality of your shipping container. Check for any remaining dirt, rust, or imperfections that could affect paint adhesion or appearance. Verify that all rust has been treated and that the surface is smooth and even.
Weather Considerations
Next, consider the weather conditions for painting. Check the forecast to ensure that you have a window of suitable weather. Avoid painting in direct sunlight, high winds, or when rain is predicted within 24 hours. Ideal conditions are typically overcast or lightly shaded with moderate temperatures.
Equipment Readiness
Ensure that all necessary equipment is in good working order. This includes paint sprayers, rollers, brushes, and any other tools required for the painting process. Having everything ready will streamline the painting process and prevent delays.
Final Cleaning Before Painting
Just before painting, give the container a final clean to remove any dust or debris that may have accumulated since the final inspection. Use a tack cloth or a damp cloth to wipe down the surfaces, ensuring they are clean and ready for painting.
By following this final pre-painting inspection checklist, you can ensure that your shipping container is properly prepared for painting, resulting in a durable and visually appealing finish.
Conclusion
Properly preparing a shipping container for painting is crucial for a successful and long-lasting finish. By following the steps outlined in this guide, you can ensure a durable and high-quality paint job.
The process involves thorough cleaning, rust removal, surface preparation, and applying primer. Understanding how to prepare a shipping container for painting is essential to achieving a professional-grade finish.
By adhering to best practices for painting a shipping container, you can protect your investment and enhance the container’s appearance. Effective preparation is key to a successful painting project.